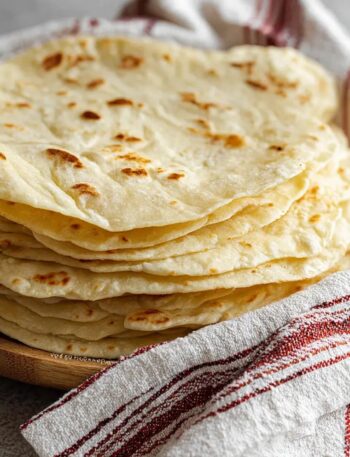
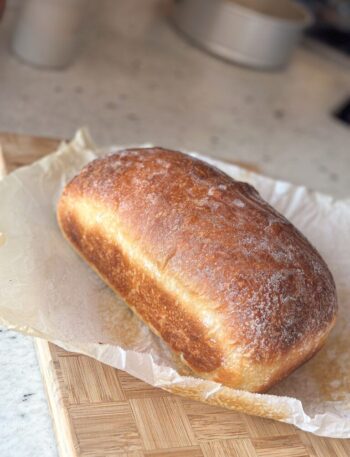
There’s nothing quite like the smell of freshly baked bread filling your kitchen. This soft homemade white bread is simple, fluffy, and perfect for everyday meals. The loaf has a golden-brown crust with a soft, tender center that makes it great for sandwiches, toast, French toast, or simply spreading with butter.
You don’t need any fancy ingredients to make this bread. A few pantry staples, some yeast, and a little patience are all you need. The dough is easy to work with, and the result is a beautiful homemade loaf that tastes so much better than store-bought bread.
Why You’ll Love This Homemade Bread
This recipe is a great choice if you’re new to baking bread because it uses simple ingredients and straightforward steps. The dough rises nicely and bakes into a soft loaf with a light texture.
It’s also easy to customize. You can make one large loaf or divide the dough into two smaller loaves, depending on the size of your loaf pans.
The bread freezes well too, so you can bake a batch and save some for later.
Ingredients
- 4 cups all-purpose flour
- 2 ¼ teaspoons active dry yeast (1 packet)
- 2 tablespoons granulated sugar
- 1 ½ teaspoons salt
- 1 cup warm milk
- ½ cup warm water
- 2 tablespoons vegetable oil or melted butter
- Extra oil or butter for greasing the pans
For the Top
- 1 tablespoon melted butter, optional
How to Make Soft White Bread
1. Activate the Yeast
Start by warming the milk and water. They should feel warm to the touch but should not be hot. Very hot liquid can kill the yeast.
Add the warm water, warm milk, sugar, and active dry yeast to a large mixing bowl. Stir gently and let the mixture sit for about 5–10 minutes.
The yeast should become slightly foamy on top. This is a good sign that your yeast is active and ready to use.
If nothing happens after several minutes, your yeast may be old or the liquid may have been too hot or too cold.
2. Make the Dough
Add the vegetable oil or melted butter and salt to the yeast mixture.
Begin adding the flour gradually, about ½ cup at a time. Stir after each addition until the dough starts coming together.
You may not need every bit of the flour, so avoid adding it all at once. The dough should be soft and slightly tacky but not extremely sticky.
Once the dough becomes difficult to stir, transfer it to a lightly floured surface.
3. Knead the Dough
Knead the dough for about 8–10 minutes by hand.
Push the dough forward with the heel of your hand, fold it back, turn it slightly, and repeat. Continue kneading until the dough becomes smooth and elastic.
If the dough is extremely sticky, add a little more flour, one tablespoon at a time. Try not to add too much flour because an overly floury dough can produce a dense loaf.
You can also use a stand mixer fitted with a dough hook. Mix and knead on low to medium speed until the dough becomes smooth and elastic.
4. Let the Dough Rise
Place the kneaded dough into a lightly greased bowl. Turn it once so the surface is lightly coated with oil.
Cover the bowl with plastic wrap or a clean kitchen towel.
Place it somewhere warm and allow it to rise for about 1 hour, or until it has roughly doubled in size.
The exact rising time can vary depending on the temperature of your kitchen. On a cool day, the dough may need a little longer.
5. Shape the Loaves
Once the dough has doubled, gently punch it down to remove excess air.
Transfer it to a lightly floured surface and divide it into two equal portions if you want two smaller loaves.
Shape each portion into a rectangle, then roll it tightly into a loaf shape. Pinch the seam underneath to help keep the loaf together.
Place the shaped dough into greased loaf pans with the seam facing down.
6. Let the Bread Rise Again
Cover the loaf pans loosely with a clean towel and let the dough rise again for about 30–45 minutes.
The dough should become noticeably puffy and rise close to the top of the pans.
Don’t rush this step. The second rise helps create that soft, airy texture inside the bread.
7. Bake the Bread
Preheat your oven to 375°F (190°C).
Place the loaf pans in the preheated oven and bake for approximately 25–30 minutes, or until the tops are beautifully golden brown.
The bread should sound hollow when you gently tap the top.
If the tops are browning too quickly, you can loosely cover them with aluminum foil during the final part of baking.
8. Cool Before Slicing
Remove the loaves from the oven and let them cool in the pans for about 5–10 minutes.
Carefully transfer the bread to a wire cooling rack.
For an extra-soft crust, brush the tops with a little melted butter while the bread is still warm.
Allow the loaves to cool before slicing. I know it’s tempting to cut into warm homemade bread right away, but letting it cool helps the inside finish setting and makes slicing much easier.
Tips for Perfect Homemade White Bread
Use warm, not hot, liquid. The milk and water should be comfortably warm. Extremely hot liquid can damage the yeast.
Don’t add too much flour. A slightly soft dough usually creates a lighter loaf. Add flour gradually until the dough is smooth and manageable.
Give the dough enough time to rise. Rising time depends on your kitchen temperature, so focus on the dough rather than the clock. It should visibly increase in size.
Knead until smooth. Proper kneading develops gluten, which helps the bread hold its shape and gives it a soft, chewy texture.
Let the bread cool. Cutting the bread too soon can make the center seem gummy. Give it enough time to cool before slicing.
How to Store Homemade Bread
Once completely cooled, store the bread in an airtight container or bread bag at room temperature. It should stay soft for several days.
Avoid storing fresh bread in the refrigerator unless necessary because refrigeration can make bread go stale faster.
For longer storage, slice the bread and place it in a freezer-safe bag. Freeze for up to a few months. When you need it, simply remove the slices and let them thaw at room temperature or toast them directly from frozen.
Ways to Serve This Bread
This homemade white bread is incredibly versatile. Use it to make classic sandwiches with turkey, chicken, cheese, or vegetables. Toast a couple of slices and top them with butter, jam, peanut butter, or honey.
You can also use it for grilled cheese, French toast, bread pudding, breakfast toast, or simple garlic toast.
Freshly baked slices are especially delicious while still slightly warm with a little butter.
Frequently Asked Questions
Can I use bread flour instead of all-purpose flour?
Yes. Bread flour can be used and may give the loaf a slightly chewier texture because it generally contains more protein than all-purpose flour.
Can I make this bread without milk?
Yes. You can replace the milk with additional warm water, although the finished bread may be slightly less rich and tender.
Why didn’t my bread rise?
The most common reasons are inactive yeast, liquid that was too hot or too cold, or a kitchen that is too cool. Make sure your yeast is fresh and give the dough enough time in a warm environment.
Can I make one large loaf?
Yes. Instead of dividing the dough into two portions, you can shape it into one loaf and place it in a larger loaf pan. You may need to adjust the baking time slightly.
Final Thoughts
Making homemade bread from scratch is easier than it looks. With basic ingredients and a little patience, you can create soft, fluffy loaves with a golden crust right in your own kitchen.
This classic white bread is a recipe worth keeping in your collection because it works for breakfast, lunch, dinner, and everything in between. Once you taste a warm slice of homemade bread with butter, you may find yourself making it again and again.