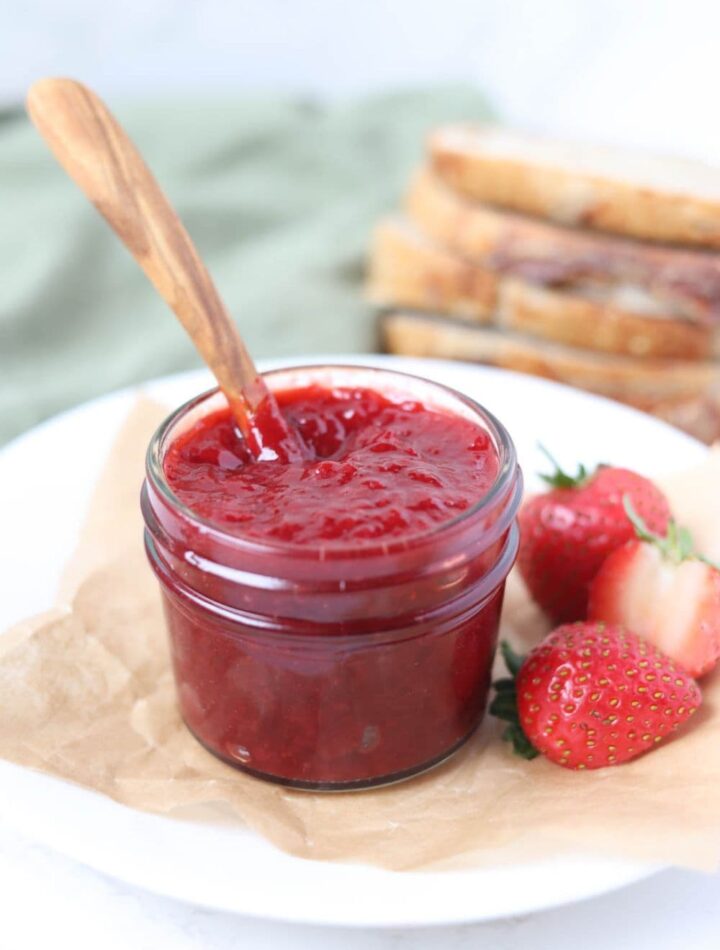
There is something special about homemade strawberry jam. The bright red color, fresh strawberry flavor, and glossy texture make it so much better than many store-bought versions. When strawberries are at their sweetest and most flavorful, making a batch of homemade jam is a wonderful way to preserve that seasonal taste for later.
This homemade strawberry jam is sweet, fruity, and deliciously spreadable. It is perfect on warm toast, biscuits, English muffins, pancakes, waffles, or freshly baked bread. You can also swirl it into yogurt, spoon it over cheesecake, or use it as a filling for cookies and cakes.
The recipe below uses powdered pectin to help create a reliable gel. The National Center for Home Food Preservation provides a tested strawberry jam recipe using crushed strawberries, powdered pectin, and sugar, with a boiling-water canning process.
Why You’ll Love This Strawberry Jam
Homemade jam has a freshness that is hard to beat. The strawberries provide a beautiful natural color and fruity flavor, while sugar balances their tartness and helps create the classic jam texture.
This recipe is also convenient for making several jars at once. Once properly processed and sealed, the jars can be stored as part of your home pantry rather than keeping everything in the refrigerator.
It is especially nice to make this recipe when strawberries are plentiful. You can prepare several jars for your own family or give beautifully labeled jars as homemade food gifts.
Ingredients
- 5½ cups crushed strawberries — about 3 quart boxes of strawberries
- 1 package powdered pectin
- 8 cups granulated sugar
This quantity makes approximately 9 to 10 half-pint jars, according to the tested NCHFP recipe.
Choosing the Strawberries
For the best flavor, choose ripe, fresh strawberries with good color and no signs of spoilage. Wash them thoroughly, remove the green caps, and drain them well before crushing.
Avoid using berries that are moldy or damaged. Since the fruit is the main flavor in this recipe, good-quality strawberries make a noticeable difference.
How to Make Strawberry Jam
1. Prepare the Strawberries
Wash the strawberries thoroughly under cool running water. Drain them well and remove the stems and caps.
Crush the strawberries. You can use a potato masher for a slightly chunky texture or crush them more thoroughly if you prefer a smoother jam.
Measure 5½ cups of crushed strawberries accurately. Measuring the fruit after crushing is important because the tested recipe depends on the specified ingredient proportions.
2. Prepare the Jars
Before beginning the cooking process, prepare your canning jars and two-piece lids according to current canning guidance and the manufacturer’s instructions.
Keep the jars hot until they are ready to be filled. Hot jam should go into hot jars to help reduce the risk of thermal shock.
3. Combine Strawberries and Pectin
Place the measured crushed strawberries into a large saucepan or kettle.
Add the powdered pectin and stir thoroughly so that it is evenly distributed throughout the fruit.
Place the pot over high heat and, while stirring constantly, bring the mixture quickly to a full boil. A full boil means the mixture continues boiling even while you are stirring it.
4. Add the Sugar
Once the strawberry mixture reaches a full boil, add the 8 cups of sugar.
Continue stirring until the sugar is incorporated. Bring the mixture back to a full, bubbling boil.
Once it reaches that stage, boil hard for 1 minute, stirring constantly. This is the tested cooking method for this pectin-based strawberry jam.
5. Remove Foam
Take the jam off the heat.
If foam has formed on the surface, skim it off with a clean spoon. Removing excess foam gives the finished jam a cleaner appearance.
The jam will still look fairly fluid while it is hot. Don’t worry if it doesn’t look exactly like refrigerated jam at this stage. It will develop its final texture as it cools.
Filling the Jars
Ladle the hot jam into prepared hot jars, leaving ¼ inch of headspace.
Wipe the jar rims carefully with a clean, damp paper towel. Any jam or syrup left on the rim can interfere with the lid sealing properly.
Place the prepared two-piece lids on the jars and adjust them according to the manufacturer’s instructions.
Processing the Strawberry Jam
Place the filled jars into a boiling-water canner. Make sure the jars are covered appropriately with boiling water according to your canner’s instructions.
For the tested NCHFP strawberry jam recipe, the recommended processing time for half-pint or pint jars is:
- 0–1,000 feet: 5 minutes
- 1,001–6,000 feet: 10 minutes
- Above 6,000 feet: 15 minutes
These processing times come from the National Center for Home Food Preservation’s tested strawberry jam recipe.
After processing, carefully remove the jars and allow them to cool undisturbed. Once completely cool, check the seals according to standard home-canning practice.
Any jar that does not seal properly should not simply be stored in the pantry. Follow safe home-canning guidance for handling an unsealed jar.
Tips for the Best Strawberry Jam
Use good strawberries. The better the berries taste, the better the finished jam will taste.
Measure carefully. Jam recipes rely on specific ratios between fruit, sugar, acid, and pectin. Changing those quantities can affect the final gel and the reliability of the recipe. NCHFP notes that successful jellied products depend on the proper balance of fruit, pectin, acid, and sugar.
Don’t substitute pectin types casually. Powdered and liquid pectin are not interchangeable in tested recipes. If you want to use a different type of pectin, follow a recipe specifically tested for that product.
Don’t rush the boiling step. The recipe calls for the strawberry mixture to reach a full boil and then boil hard for one minute after the sugar is added. Follow the tested instructions rather than guessing based only on appearance.
Leave the correct headspace. For this recipe, the tested instruction is ¼ inch. Proper headspace helps the jars process and seal correctly.
How to Serve Strawberry Jam
There are so many ways to enjoy homemade strawberry jam. Spread it over buttered toast for an easy breakfast, spoon it onto pancakes or waffles, or serve it alongside warm biscuits.
It also makes a wonderful dessert ingredient. Try adding a spoonful between layers of vanilla cake, swirling it through cheesecake batter, or using it as a filling for thumbprint cookies.
For a simple snack, spread strawberry jam over toasted sourdough bread with a little cream cheese. The combination of creamy, tangy cheese and sweet strawberry jam is delicious.
How to Store Homemade Strawberry Jam
Properly processed and sealed jars can be stored according to established home-canning storage recommendations. Store them in a cool, dry, dark place and check the jars before opening.
If a jar shows signs of spoilage, an abnormal odor, mold, leakage, or a compromised seal, do not taste it. When preserving food at home, following tested canning procedures is important for safety.
For beginners, the National Center for Home Food Preservation recommends reviewing its general home-canning principles and boiling-water canning instructions before starting.
Final Thoughts
Homemade Strawberry Jam is one of those recipes that feels both simple and special. Fresh strawberries are transformed into a beautiful, glossy preserve that can brighten up breakfast, desserts, and homemade bread throughout the year.
The combination of sweet strawberries and classic jam texture makes this a recipe worth making whenever fresh berries are at their best. And because the recipe produces multiple jars, it is also a lovely option for homemade gifts.
Whether you’re spreading it over toast in the morning, serving it with warm biscuits, or saving a few jars for later, homemade strawberry jam brings a little taste of summer to the pantry.
Recipe Summary
Prep Time: 20 minutes
Cook Time: About 15–20 minutes
Processing Time: 5–15 minutes, depending on elevation
Yield: About 9–10 half-pint jars
Category: Jam / Canning
Main Ingredient: Fresh Strawberries
Important: For shelf-stable canning, use the tested ingredient quantities and processing instructions rather than changing the fruit, sugar, pectin, or processing time.